Scheduled Reports Overview (Video)
The Scheduled Reports module allows you to schedule reports to automatically email you or your team including recent reports, training status, inspection status, participation, follow-ups, and more.
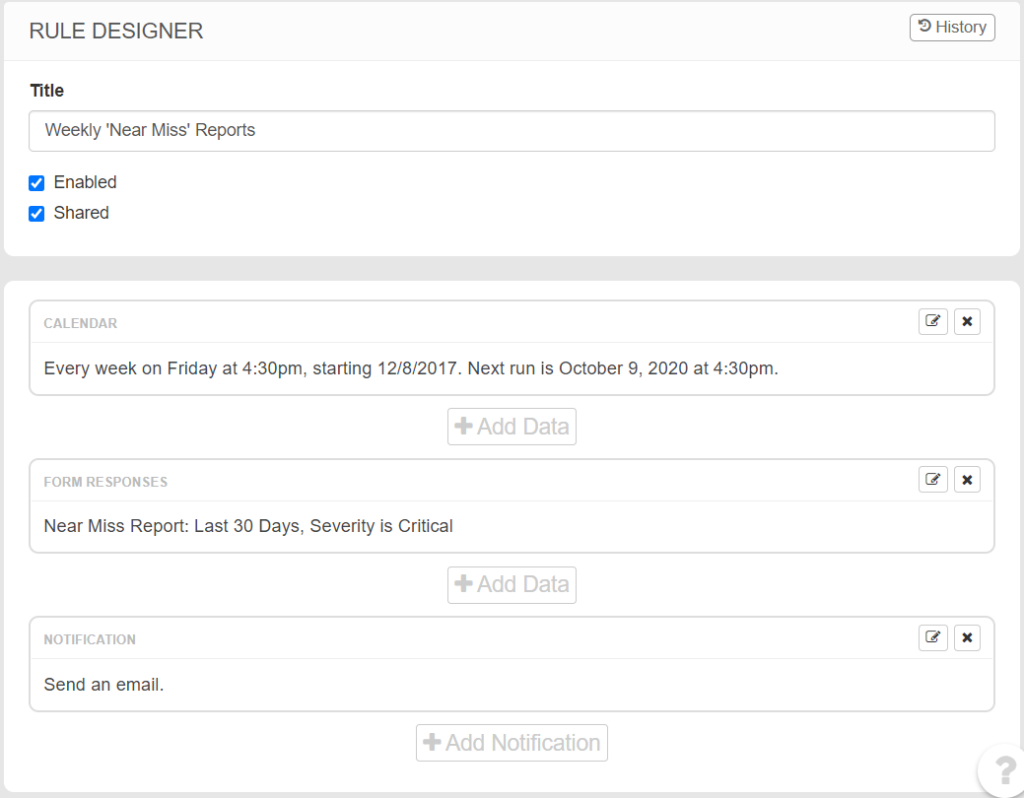
The example below shows a Weekly ‘Near Miss’ Reports that will send an email, every Friday at 4:30 pm, with a report detailing all Near Miss reports submitted in the last 30 days where the Severity is marked as Critical.
CREATING A NEW SCHEDULED REPORT
NOTE: To edit Scheduled Reports, you must have the Edit Scheduled Reports permission granted to you.
Navigate to Control Panel > Scheduled Reports to access the Scheduled Reports module.
If your site does not have any Scheduled Reports created yet, click the Create New Scheduled Reports button, or click the +Add button to add new Scheduled Reports to your list of existing reports.
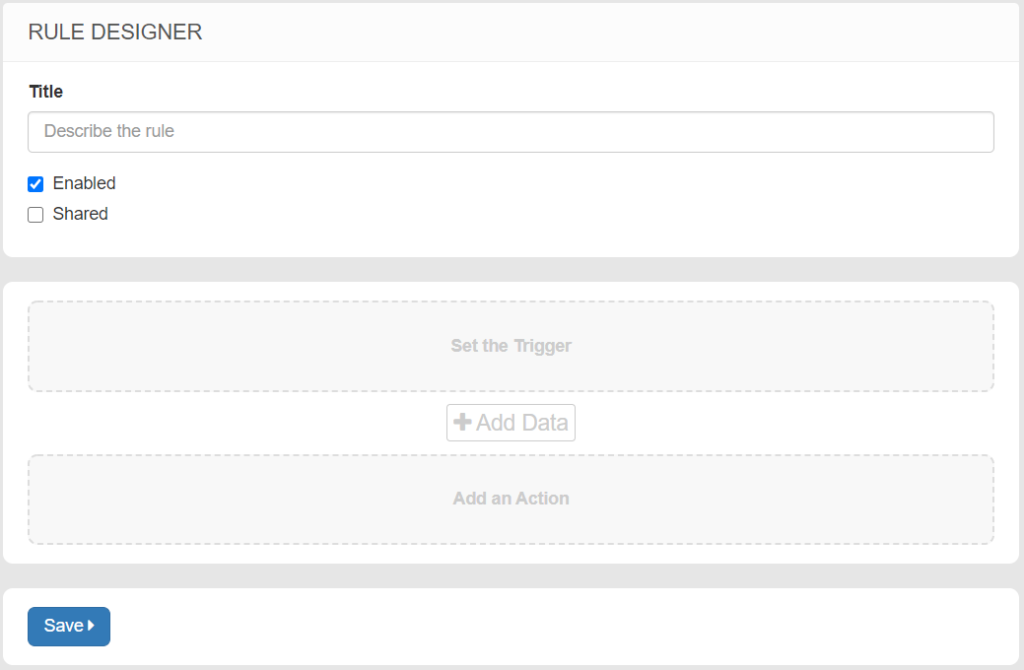
- The title is used to describe or identify the Scheduled Reports.
- The Enabled button allows you to turn the Scheduled Reports on or off.
- Click the Shared button if you want to allow other employees to view or edit this Scheduled Report. When unchecked, this creates a Private Scheduled Reports that only you can view and edit. For other employees to view private Scheduled Reports, they would need to have the View Private Scheduled Reports permission granted.
Set the Trigger (when the Scheduled Report will run)
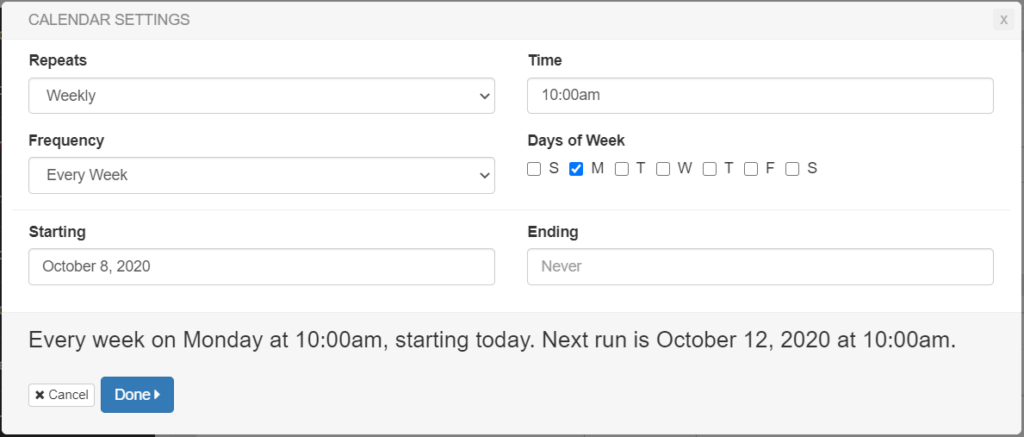
- Click Set the Trigger option to create the Calendar settings for when this Scheduled Report will run.
- You can select how often, what time of day, which days, when to start, and when to end this Scheduled Report. Click Done to save your settings.
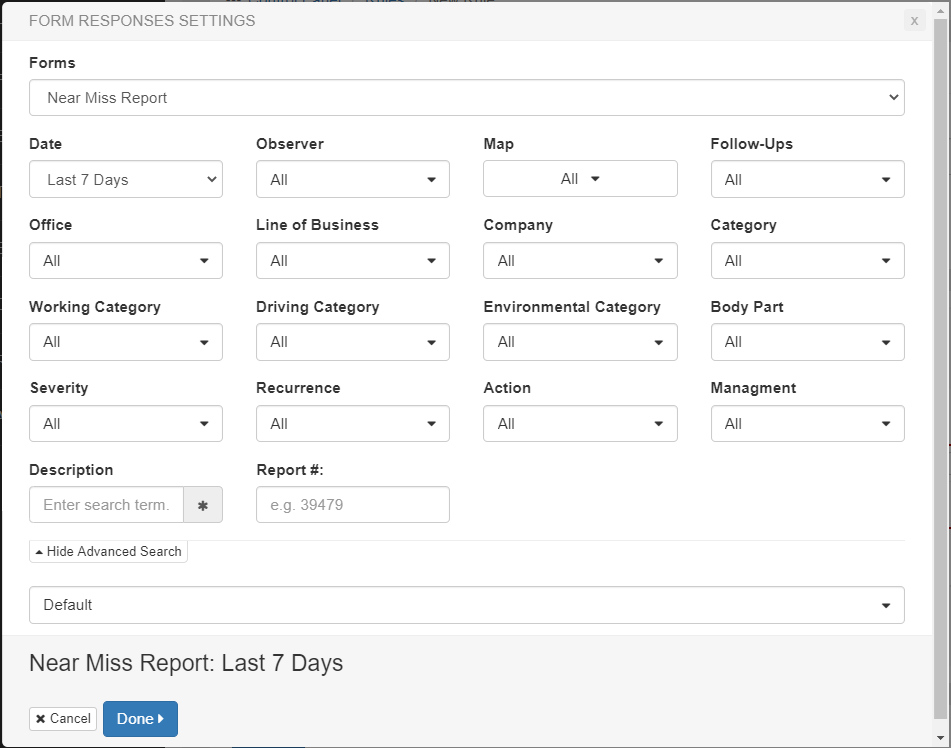
Add Data (what info will be included)
- The +Add Data button allows you to select which data you would like to send. You can add multiples types of data within the same Scheduled Report.
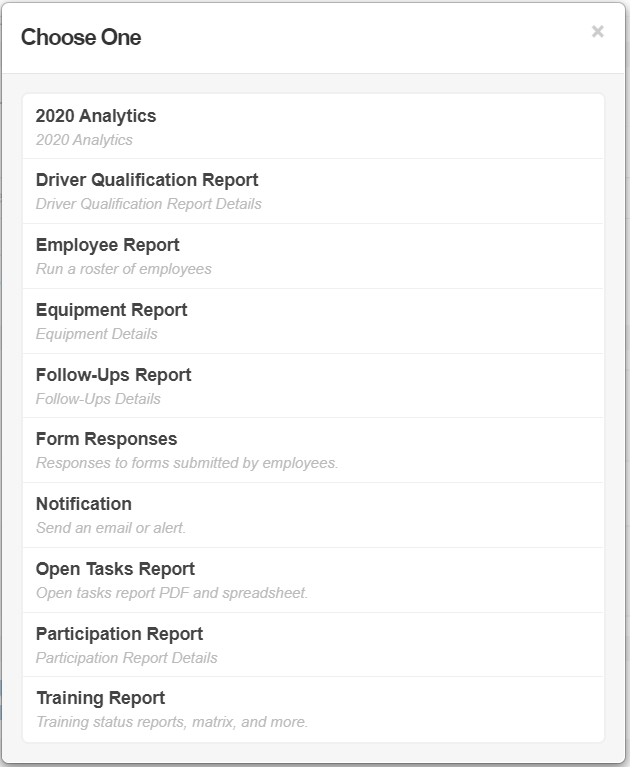
- After selecting the type of data, use drop down filters to select the conditions for your report, then click Done to save those settings.
Add an Action (how the info will be sent and to whom)
- Next, click Add an Action to create the notification settings.
- Here, you will select who you want to receive this report. You can choose groups of employees based on conditions like Job Title, Location, Line of Business, etc., or send to certain individuals.
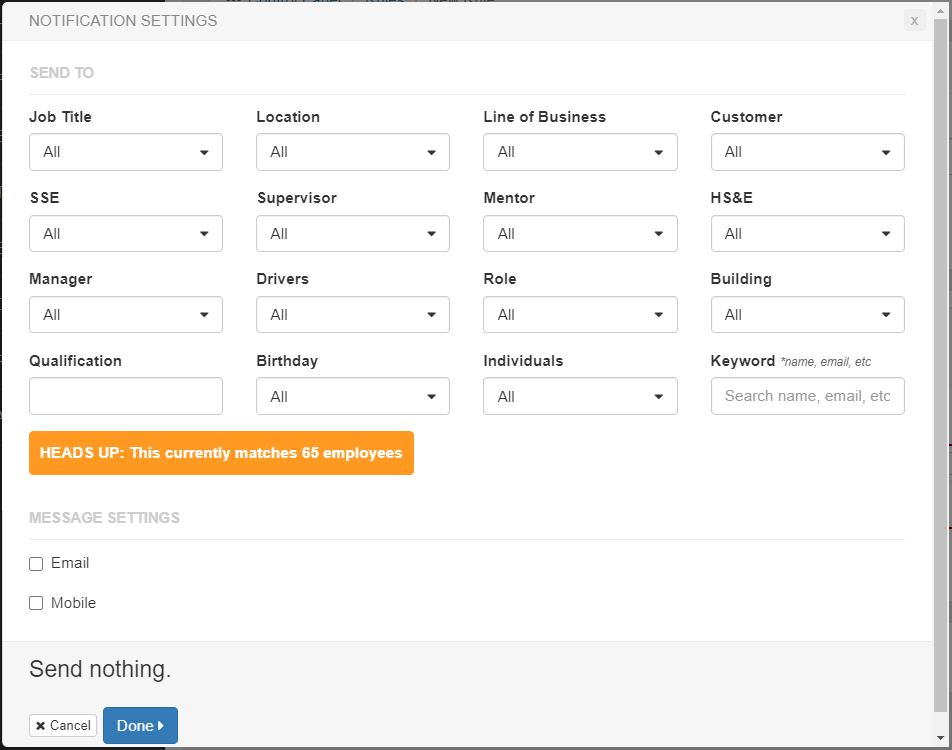
- After selecting who will receive the report, select Email, Mobile, or both for the type of message you want to send.
- When choosing either one, customize the message to be sent, then click Done to save your settings.
Saving the Scheduled Reports
- Once your Scheduled Report is set up, click Save to complete.
- The Save & Send To Me option will allow you to preview the report and data before the Scheduled Report runs for the first time.

Viewing or Editing Scheduled Reports
If you have the Edit Scheduled Reports and/or Edit Private Scheduled Reports permissions, you can see Scheduled Reports that are set up and make changes to them if necessary.

The My Scheduled Reports section displays details about Private and Shared Scheduled Reports, their Status, who created the Scheduled Report, and the last time the Scheduled Report ran.

